Brisket has a reputation for being the cook that humbles people. One weekend it is tender enough to pull apart with your fingers; the next, the same cut comes out dry, tight, or full of soft bark. The good news is that brisket is not a magic trick. It is a long cook built around a few repeatable decisions: choose a manageable piece, keep the fire clean, cook until the connective tissue gives up, and allow enough time to rest.
Plan roughly 60 to 90 minutes per pound at 225–250°F, but use temperature and feel—not the clock—to decide when brisket is done. Wrap when the bark looks right, start checking for tenderness around 195°F, and rest the brisket for at least one hour before slicing.
What makes brisket difficult?
Brisket comes from the hardworking chest muscles of the steer. Those muscles contain a lot of collagen, so a low-and-slow cook is needed to turn that collagen into gelatin. If you pull the brisket too early, it can be chewy even when the thermometer shows a respectable number. If you leave it in a hot cooker too long, the lean flat can lose more moisture than it can spare.
There are two sections: the thicker, fattier point and the flatter, leaner flat. A whole packer brisket contains both. A flat is easier to handle for a first cook, while a full packer gives you more slices and richer burnt ends but asks more of your smoker and your schedule.
Shopping for a beginner-friendly brisket
Look for a brisket with a flexible flat, an even thickness, and a good layer of white fat on the point. USDA grading is a useful starting point, but marbling matters more than a label alone. Choice-grade brisket can be excellent when the marbling is even; Prime generally gives you a larger margin for error because it carries more internal fat.
- Flat: Choose one with a thick end rather than a very thin, tapered flat.
- Whole packer: Allow enough room for the brisket to sit without touching the walls or water pan.
- Weight: Buy a little more than you need. Trimming removes fat and hard edges, and cooked brisket loses weight.
- Packaging: Keep raw brisket cold and separate from ready-to-eat foods during transport and prep.
Equipment and ingredients
You do not need an expensive competition setup. A stable smoker, a reliable grate-level thermometer, a sharp slicing knife, and a large cutting board will carry you through the cook. A dual-probe thermometer is helpful because one probe can track the meat while the other confirms the actual cooking temperature near the brisket.
- Brisket flat or whole packer
- Coarse salt and coarse black pepper (a simple 1:1 blend works well)
- Neutral binder such as water or a thin coat of mustard, optional
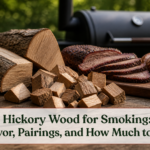
- Oak, pecan, or another mild-to-medium smoking wood
- Pink butcher paper or heavy-duty foil, optional
- Clean spray bottle, heatproof gloves, and a large cooler or warm oven for resting
For food-safety basics, follow the USDA FSIS guidance for smoking meat and poultry. A smoker temperature is not the same thing as a safe internal food temperature, and the brisket’s final tenderness target is a texture decision made after it is safely cooked.
Trim the brisket without overthinking it
Place the cold brisket fat-side up and remove the hard, waxy fat that will not render. Shape loose flaps and thin corners so they do not burn before the thick center is tender. Leave about ¼ inch of softer fat on the surface. It protects the meat while it cooks and gives the finished slices a pleasant richness.
There is no prize for removing every gram of fat. The goal is an even shape and a clean surface for seasoning, not a perfectly sculpted piece of meat. If the brisket is your first one, take a quick photo before trimming so you can compare the raw shape with the cooked result.
Season it simply
Pat the brisket dry, then apply a light binder if you like. Sprinkle salt and pepper evenly over every side, including the edges. You want a visible coating, not a thick crust of seasoning. Rest the seasoned brisket in the refrigerator for at least an hour, or overnight if your schedule allows. Take it out while the smoker comes up to temperature; it does not need to warm to room temperature.
Set up the smoker for a clean cook
Preheat the smoker to 225–250°F and make sure the cooking grate is actually at that temperature. Built-in lid gauges can read high or low, especially on vertical cookers. Place the brisket with the thicker point toward the hotter area of your cooker. On many offset smokers, that means the point faces the firebox. On an electric or pellet smoker, check the manufacturer’s airflow and rack guidance.
Use dry, seasoned wood and a small amount at a time. Heavy white smoke usually means the fire is smoldering, the wood is too large, or the fire needs more oxygen. Aim for the light, barely visible smoke described in our thin blue smoke guide. If you are still learning to hold the pit near 225°F, the 225°F temperature-control guide covers probe placement, airflow, weather, and controller cycles.
Step-by-step brisket cook
1. Start with the fat side in the best position
There is no universal “fat up” rule. Put the thicker, more protected side toward the heat source and keep the lean flat away from direct radiant heat. The important part is to avoid a thin edge sitting directly over a hot spot.
2. Cook until the bark is set
For the first several hours, leave the lid closed and let the surface dry. Opening the smoker every 20 minutes stretches the cook and makes temperature swings worse. You can spritz if the surface looks genuinely dry, but frequent spritzing is not required for good brisket.
3. Decide whether to wrap
When the bark is a deep mahogany color and does not wipe away when you touch it, usually somewhere around 160–175°F internal, you can wrap. Pink butcher paper preserves more bark and lets some moisture escape. Foil speeds the cook and holds more liquid, but it can soften the bark. Leaving the brisket unwrapped is also valid if the bark and cooking time are working for you.
4. Cook until it feels tender
After wrapping, return the brisket to the smoker and begin checking around 195°F. Slide a thin probe through the flat in several places. It should feel like pushing into softened butter, with little resistance. One section can be ready while another is still tight, so check the flat and the point separately.
5. Rest before slicing
Move the brisket to a tray and crack the wrap for a few minutes so excess steam can escape. Then rewrap and rest it in an empty cooler or a low oven. An hour is good; two hours is often better for a whole packer. Resting lets the juices redistribute and gives the collagen time to settle instead of running onto your cutting board.
Brisket temperature and timing guide
| Stage | Typical internal range | What to look for |
|---|---|---|
| Smoke absorption and bark building | 120–160°F | Dry surface, darkening bark, clean smoke |
| Wrap decision | 160–175°F | Bark is set and the color looks right |
| Start tenderness checks | 195°F+ | Probe resistance begins to soften |
| Finish | Often 195–205°F | Flat probes tender in several spots |
| Rest | At least 1 hour | Juices settle; slices hold together |
The ranges are guides, not promises. A small flat may finish well below 205°F, while a heavily marbled packer may need more time. Record the cooker temperature, wrap point, and feel for the next cook instead of chasing a single magic number.
How to slice brisket
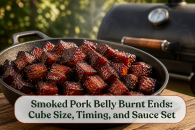
Separate the point and flat if you cooked a whole packer. Notice the grain direction before you cut; it changes where the muscles meet. Slice the flat across the grain into pencil-thick pieces. Turn the point as needed and cut slightly thicker slices or cubes for burnt ends. If slices crumble, the brisket may be overcooked. If they bend without breaking and feel moist, you are in the sweet spot.
Common beginner mistakes
- Cooking by the clock: Timing estimates help you plan dinner, but tenderness decides when the brisket is ready.
- Trusting the lid thermometer: Measure at grate level beside the meat.
- Adding too much wood: Bitter flavor usually comes from dirty, heavy smoke rather than a lack of smoke.
- Wrapping too early: If the bark is pale and soft, wrapping can lock in a surface that never develops.
- Slicing immediately: Hot brisket can lose a surprising amount of juice on the board.
- Saving the thin end for last: Serve the lean flat first or moisten it with collected juices when reheating.
What to do with leftovers
Chill leftovers promptly in shallow containers and refrigerate them. Slice only what you plan to serve and keep the rest in larger pieces so it stays moist. Reheat gently with a splash of broth or collected drippings. Our guide to reheating smoked meat explains oven, skillet, and sous-vide-style options without cooking the brisket twice.
Final brisket advice
For your first brisket, choose a forgiving piece, cook at a steady 225–250°F, and build your schedule around a long rest. Keep the fire clean, use a grate-level probe, and trust the feel of the meat more than a fixed finish temperature. Even a less-than-perfect brisket teaches you something useful about your smoker—and the next one will be better.
For a wider reference on safe cooking temperatures and timing, bookmark our smoking times and temperatures chart. Then give yourself a full day, invite a few hungry people, and enjoy the process. Happy smoking!